Walkthrough 12-1: Trigger a flow when a new file is added to a directory
In this walkthrough, you load data from a local CSV file when a new file is added to a directory. You will:
· Add and configure a File listener to watch an input directory.
· Restrict the type of file read.
· Rename and move the processed files.
Starting file
If you did not complete walkthrough 7-4, you can get a starting file here. This file is also located in the solutions folder of the student files ZIP located in the Course Resources.
Locate files and folders
1. In your computer’s file browser, return to the student files for the course.
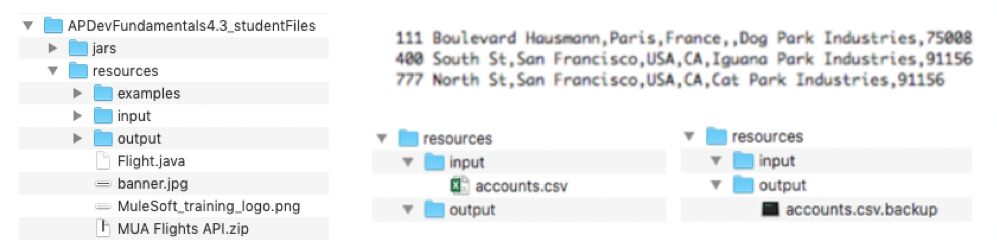
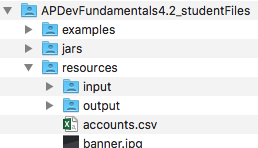
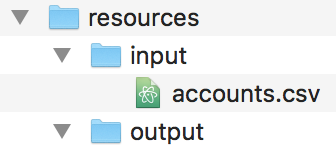
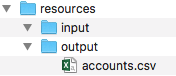
2. Open the resources folder and locate the accounts.csv file and the input and output folders.
3. Leave this folder open.
Add the File module to the project
4. Return to Anypoint Studio and open the apdev-examples project.
5. Open accounts.xml.
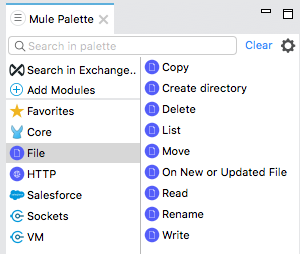
6. In the Mule Palette, select Add Modules.
7. Select the File connector in the right side of the Mule Palette and drag and drop it into the left side.
8. If you get a Select module version dialog box, select the latest version and click Add.
Create a flow that monitors a location for new files
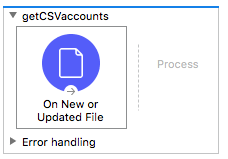
9. Locate the On New or Updated File operation for the File connector in the right side of the Mule Palette and drag and drop it at the top of the canvas to create a new flow.
10. Rename the flow to getCSVaccounts.
Configure the File connector
11. Open global.xml and switch to the Global Elements view.
12. Click Create.
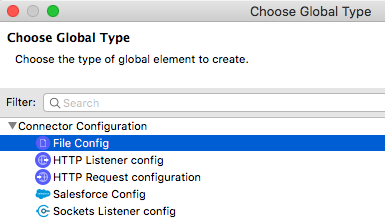
13. In the Choose Global Type dialog box, select Connector Configuration > File Config and click OK.
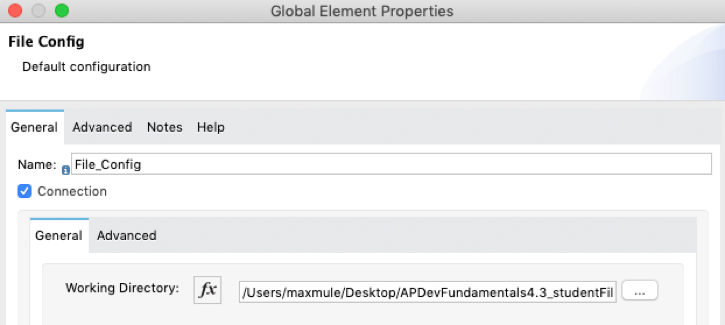
14. In the Global Element Properties dialog box, select the Connection checkbox then click the browse button next to working directory.
15. Browse to the student files folder for the course.
16. Select the resources folder and click Open.
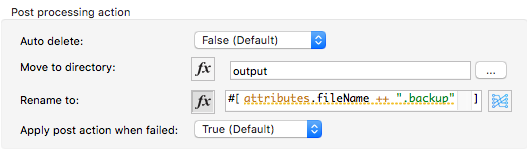
17. Select and cut the value of the working directory that got populated and replace it with a property ${file.accountsDir}.
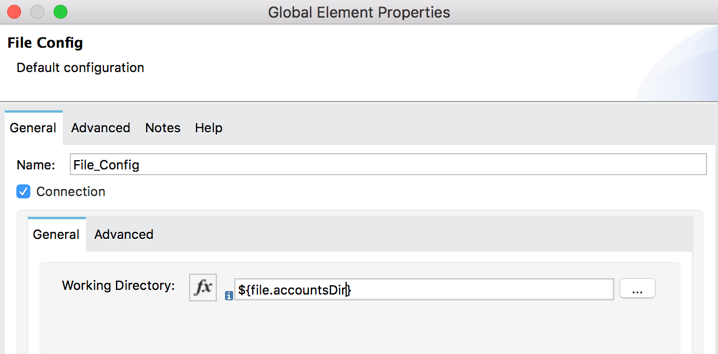
18. In the Global Element Properties dialog box, click OK.
19. Open config.yaml in src/main/resources.
20. Create a new property file.accountsDir and set it equal to the value you cut.
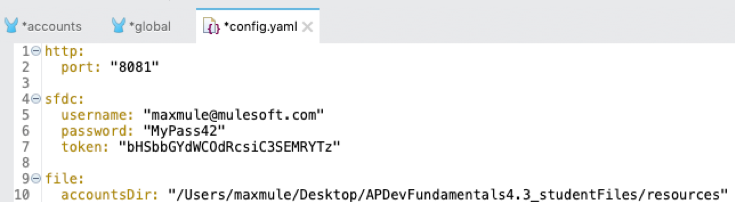
Note: Users on all OSs, including Windows, should use forward slash characters as shown.
Configure the On New or Updated File operation
21. Return to accounts.xml.
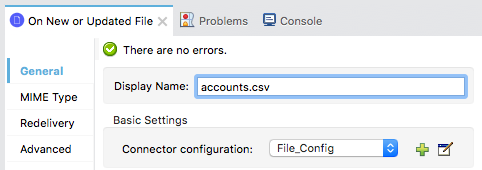
22. In the On New or Updated File properties view, change the display name to accounts.csv.
23. Set the connector configuration to the existing File_Config.
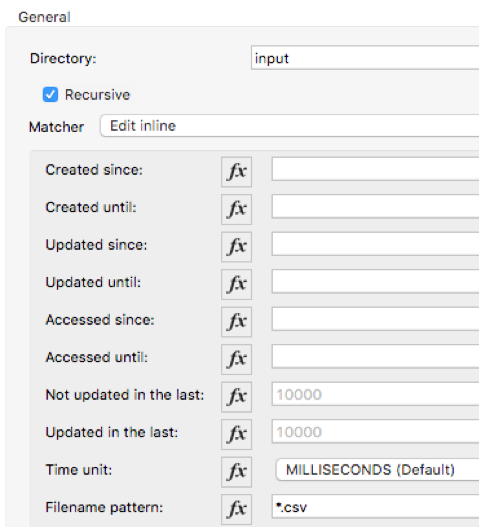
24. In the General section, set the directory to input.
25. Set the matcher to Edit inline.
26. Set filename pattern to *.csv.
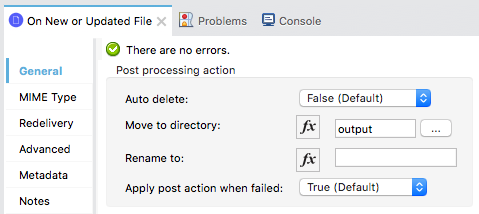
27. In the Post processing action section, set the move to directory to output.
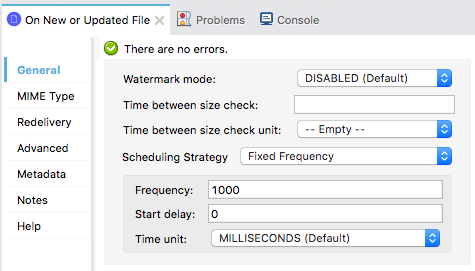
28. In the General section, review the default scheduling information; the endpoint checks for new files every 1000 milliseconds.
Review event metadata in the DataSense Explorer
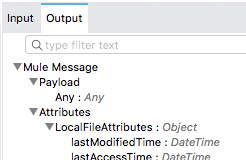
29. Select the Output tab in the DataSense Explorer; you should see no metadata about the structure of the CSV file.
Display the file contents
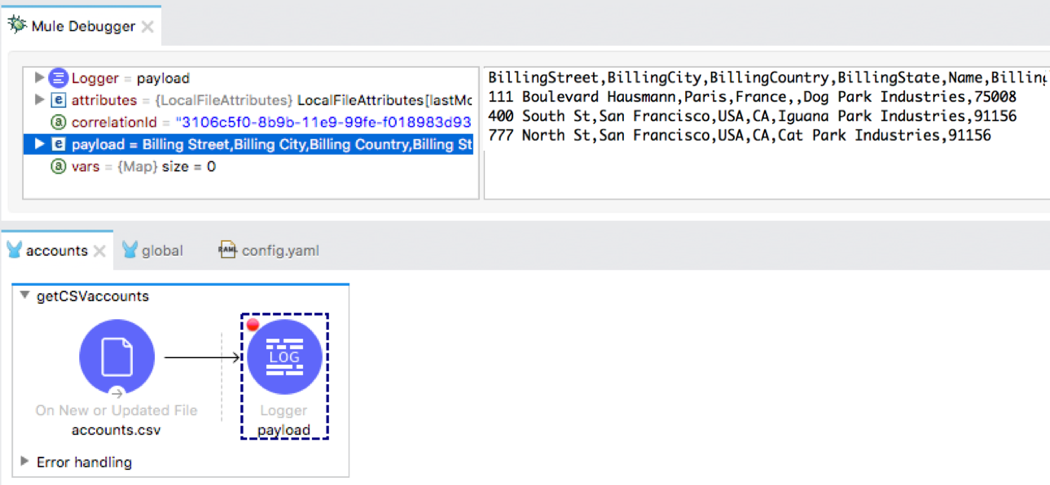
30. Add a Logger to the flow.
31. In the Logger properties view, set the display name to payload and the message to display the payload.
#[payload]

Debug the application
32. Add a breakpoint to the Logger.
33. Save the files and debug the project.
34. In your computer’s file browser, return to the resources folder in student files for the course.
35. Move the accounts.csv file to the input folder.
36. Return to the Mule Debugger and look at the payload.
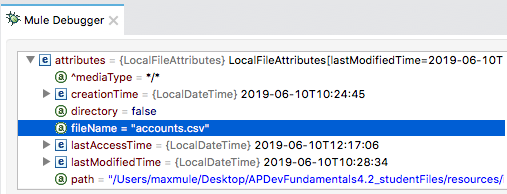
37. Expand Attributes and locate the fileName and path attributes.
38. Step to the end of the application.
39. In your computer’s file browser, return to the student files for the course; you should see accounts.csv has been moved to the output folder.
40. Return to Anypoint Studio and look at the console; you should see the file contents displayed.

Rename the file
41. Return to the accounts.csv properties view and in the Post processing action section, set the Rename to property to an expression that appends .backup to the original filename.
#[attributes.fileName ++ ".backup"]
Test the application
42. Save the file to redeploy the project.
43. Remove the breakpoint from the Logger.
44. In your computer’s file explorer, move the accounts.csv file from the output folder back to the input folder; you should see it appear in the output folder with its new name.

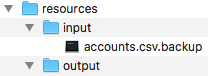
45. Move the accounts.csv.backup file from the output folder back to the input folder; it should not be processed and should stay in the input folder.
46. Return to Anypoint Studio and switch perspectives.
47. Stop the project.